Tuesday, February 26, 2013

Commercial Bathroom Stall Doors

Here's a project we worked on a few weeks ago.
We set up at night to build new stall doors in the bathrooms,
semi-rustic (whatever that means) but this is what the design
came out looking like...
I decided that using outdoor privacy fence gate hardware would fit
best with the design.
We painted them later with the restaurant colors, it seemed to fit well
with restaurant style.
Happy Privacy!

Sunday, February 24, 2013

When Mice Attack!

A rental property left vacant for just a few weeks....

This is pictures I took under the dishwasher.
All the plastic pipes under the dishwasher had been chewed on.
But it even got worse!!
The back of the pump housing was plastic as well, and it had been chewed through in multiple places...the dishwasher was a total loss.

The moral to the story is: rodents and pests can do costly damage even when no one is around and it looks as though everything is cleaned up.  It's good to have good repellent set about when a house is going to be vacant for a while.  Just the fact that rodents like to come in out of the cold, and must eat to survive, should warn us to keep repellent out to avoid this type of costly disaster.

Happy Hunting!

Closet Ideas


Here's some ideas from a closet we built.
(Click on a picture to enlarge it)
We used 3/4 inch MDF board only.  We cut it down for bracing, trim, shelves...pretty much everything except the hanging rods was made out of MDF board.
The biggest challenge was extremely small closet space.  We had to get creative to make everything fit. (Plus there was a designer working on this job, that's where the "creative" came in!)
Instead of over-cramming stuff, I built a box in the corner and left it empty, dead space.  We only lost that 12" x 12" very hard to reach corner.
We took over the garage for a couple days and used it as a shop...
Here is a finished view before the painters came in...
The shelves on the left are for normal shoes and high-heels.  In the top picture, you can see the shelves on the right that were spaced differently for taller shoes and boots.
The open spaces in the middle are for various length hanging clothes.

The man's side was similar, but all shelves were custom placed so you could use them from everything from tennis shoes to boots to work boots.

We like to visit Ikea and other large home improvement and furniture stores to get ideas on different styles. It's so much better to see it in person and see what works BEFORE you pay someone to build it!
We have even had a client that had cut-out cardboard so they could visualize the size of the shelves better!  A great idea!

Happy Closet Building! 

Saturday, February 23, 2013

No Truck

This is what you do when you're a handyman and have no truck...

Thursday, February 21, 2013

Popcorn Ceiling Removal Day

One of those days...again.  probably for 4 days.  Messy work!!

Life Sized Angry Birds Slingshot

  Here's an idea inspired by the crazy-popular Angry Birds...  I thought we came up with something pretty clever, but come to find out...lots of people have done it!

I simply used 4 inch PVC sewer pipe a couple of caps, a couple of elbows and a "T" then spray-painted it brown.
The biggest issue to me was keeping it stable from a lot of use and keeping it from twisting and turning when a lot of pressure was applied.
  I decided that using 2 "T" fence posts was the easiest and most cost effective solution.  I used bungee chords to tie it to the slingshot.
  The best launching device in our case (water balloons) was a 3 person water balloon launcher.  It turned out to be perfect for 5-10 year olds (and adults) to use!


Here is a better view of the slingshot.  I attached it with 2 large hose clamps on each side for safety.


And here are some pigs about to get clobbered....
The slingshot is now traveling from party to party...

Angry Birds Here

Happy Pig Hunting!

Simple Shed Door

  Here is an idea for a simple shed door, we built this a couple weeks ago to replace an old rotted door.

  We only used one sheet of plywood siding and 8-1x4's

  I install these with the same 1x4 layout on the back as well as the front.  Then I use coated 1-5/8 inch screws through the front and back.  This gives it more stability but it is still not really heavy.
  One of the neat things about this design is that you can use a 1/2" sheet of plywood siding and it still holds itself rigid.
   We caulk the seams and screw holes and paint it.  Everything together comes to less than 90 dollars, including the latch, hinges and paint.
Happy Door Building!

Wednesday, February 20, 2013

My Favorite Drill

   One of the benefits from being in the remodeling/handyman business for many years is being able to sample a wide variety of tools!  
  I have tried many many cordless drills and this is my favorite so far.  It's great for daily moderate to heavy use.  
  

The lightweight feel and triple-no-shadow LED lights make this a product that you will never tire of using!  It is also an impact-style of drill and can drive 3 inch drywall screws into a 2x4 with ease.
   It can get quite loud, but the benefits far outweigh the advantages.

I use this chuck for quick-connecting conventional drill bits when needed...
  The only drawback I have ever found is that if you use it more than 30 minutes straight, it can get quite hot in your hand where the skin between your thumb and forefinger meet.  I have come home many times with my skin red from use and now have some pretty good callouses!
  Overall I would highly recommend this product...

Happy Drilling!

Roof Leak

  We run across this all the time...a leaky roof that was repaired with roof tar or another cheap sealer...
  In the hot summer, most of the black tar you buy in buckets and cans and even some of the white and silver products, simply will not hold up to the heat.  It begins to break down after only 1-2 years.


This patch was done just 2 years ago and is already cracking.  Water had begun to leak back into the house.


This is one of the great products that seems to actually work, I had a report this morning from a friend that said that after applying this product and letting it dry a couple days, they could put their bare skin against it without getting burned in direct sunlight in 100+ degree weather!
  It is a great product for sealing roof leaks as well.

  The only thing you may want to be aware of is that won't match your roof, so take care to use it where it won't be seen by people passing by..

Happy Sealing!!

Popcorn Ceiling Removal

It's one of those days... sleeting outside, popcorn ceiling coming down inside...
  Two biggest tips to popcorn ceilings...1, lots and lots of plastic.  Few jobs get messier, I'd like to see Dirty Jobs do one... 2, Find someone to do it for you..unless you are really don't mind getting dirty and have a lot of upper body strength for scraping over your head!
It can be done...we spray it down with a pump up spray bottle of water then carefully scrape it.  It's easy to gouge it with a scraper.. Next we go over all the bumps and scrapes with sheetrock mud, normally a 40 minute mud so we can shoot it with texture the same day.
  Just a cheep 50 dollar texture gun will do the trick, and it can be rented as well.
  A corner of the ceiling can be shot several times and pulled back off with a sheetrock spatula until you get the desired look as you experiment with thicker and thinner mud.
More to follow...
Happy Muscle Building

Tuesday, February 19, 2013

Collapsed Ceiling (Think YOU had a bad day?)

Had this call a while back.  a good portion of the living room ceiling collapsed causing a huge mess.

  It is interesting to note that we were suffering an extreme heat wave at the time of this disaster.  The only things we noted were seriously warped ceiling joist with sheetrock nails popping through the plaster.  This was probably aggravated due to the house standing without proper insulation for many years.  The house has gone through upgrades over the years, but not before the damage from years back had taken it's toll.

  It is a common problem to see this in garages, because many are not insulated.

  If you ever see nail holes appearing in a ceiling or can detect bowing and warping in a ceiling, do not delay in checking out what the cause of the problem is.

  As you can see in the picture, a disaster could have been avoided if the bowing had been noticed.

  Extensive work had to be done, ceiling joist had to be cut out and replaced.  Most of the sheetrock had to be replaced and re-textured.

  It helps to notice the small tell-tale signs!!

Happy Cleaning...

Monday, February 18, 2013

Hot Water Heater Repair (electric)

Here is a Hot Water Heater I repaired today. The problem was that the water was hot at first then quickly got cold.

Here's what I found...
The first thing was that the thermostat here had failed. It no longer "clicked" when you turned it all the way up and all the way down. I found that it had failed in the "on" position and it also caused the Heating Element to burn out.

There was two elements, one worked and one didn't...that's why the water was hot at first, then quickly got cold.

Removing the thermostat is simple, make sure the power is off, double check then re-check that the power is off!!! Unscrew the wires and pull the tabs up (shown with arrows) and slip it out...
The heating element is shown here.

But first....you must drain your tank....
Today I had a more difficult problem because the drain had frozen, so instead of doing it the easy way with a water hose, I actually had to remove the element and let the water fly!! It took 11, 5 gallon buckets almost full of water to remove it all....Got quite messy...

Remember to make sure you turn off the cold water supply to the hot water heater. Releasing the pop-off valve at the top of the water heater can allow an air-break allowing the water to drain faster as well.

Again, making sure the power is off, remove the wires. Then as you can see a couple of pictures above here.... there is a large nut that is actually built onto the element. Turn ONLY the silver nut part, do NOT use the plastic casing around the wires to turn the element.
This is the new heating element going back into the hot water heater...Make sure you match the exact wattage element...

Remember to re-fill the heater before you turn it on!!

I leave the pop-off valve open and turn the water back on, then wait 5 or so minutes until it gets full and quickly shut it off when I hear water going through it.

Make sure all your shields are back in place, turn the breaker back on, (hopefully there are no sparks...haha) and listen for the water to start to boil!!

"Happy Hot Shower!"


Sunday, February 17, 2013

A Gallon of Paint and Some Scraping

It's amazing what a 24 dollar gallon of paint and a little elbow grease will do...

This old shed was an eyesore, but with just an hour and a half of work and a few dollars for paint....even the neighbors are happier!


"Happy Scraping"

Gate for a Headboard!?

Installed a gate used as a headboard last week! Pretty interesting look.


We left it as-is, no sanding, scraping or prepping...just coated it with 3 layers of clear coat to keep the rusty areas from flaking off...

Rot Repair Trick (Siding)


  Siding has a tendency to rot along the bottom where rain splashes up and moistens the bottom of the wood that normally does not get painted. In the picture below you can see an extreme example of this.


When the budget is small, there is a way around changing out the entire sheet of siding and it can also prevent further damage to the house. In the picture below, you can see where we went over the rot with treated 1x4's and it now looks like it belongs there.


You must take care to caulk the top edge really well so additional water does not penetrate, and also make sure when you cover the rot that there are no openings that ants or other small insects can get through. Take care to paint the UNDERSIDE of the board as well that faces the ground so it will keep it from rotting in the future.

"Happy Fixin"

Saturday, February 9, 2013

Mailbox Time!

  Here I will focus more on setting up a mailbox on the street rather than a "designer" mailbox..

  NOTE:  Make sure you double check with your local postal regulations BEFORE installing a mailbox, some towns have very strict rules on types of posts and boxes.  Height above the road is very important as well.   Many rural areas and addresses on highways require break-away posts.  Sometimes County maintenance will require them coming out to set it for you at their specs.
  When in doubt, match what all your other neighbors did and you should be ok!

   Hardware stores have a lot of new products available now that makes setting a mailbox much easier than before.
Here is a "Drive-in" anchor, available at True Value Hardware Click here to view it


Or you can go with the traditional type like the one pictured below that I installed in North Texas.
This set-up cost less than 55 dollars including concrete
  If you plan to set one in concrete and it's allowable in your neighborhood, Dig a hole with a post hole digger to a minimum depth of 18".   Use 60 lbs of fast-setting concrete so you can set the treated 4x4 in the ground and have it dry quickly.  While it is drying, assemble the mailbox and by the time you finish, the concrete should be hard enough to mount the box.

   If you don't have a saw large enough, most major hardware stores can cut the lumber for you.  Take the measurement the postal service requires and add 18" to it to set it in the ground at the correct.  If you have a curb in your neighborhood, you will only need to add about 12" to the length of the post because of the added height of the ground.
   Dig the hole, checking your measurements often until you are at the correct height, then level the post and pour concrete around it.
To make your job even easier, you can buy a mounting bracket for the top of the post that is NOT included with mailboxes.  This one is shown at True Value Hardware Here

  You can mount a standard mailbox to this bracket and they start out around 25 dollars.

Or you can get creative....

Here's a link I found this morning for a really fancy mailbox...

Happy Mailboxing!

Thursday, February 7, 2013

Gel Stain

Gel stain is a really great product to use in the place of traditional stains.  You are almost unlimited on the types of finishes you can do. 
  Coat what you want to stain with a paint first, (you might want to experiment on a piece of junk wood first to figure out what outcome you want)
  When you start coating with the stain, usually with a cotton rag, the lighter you press down, the darker it will come out.  Pressing hard will leave it lighter.  Most of the time, it is better to apply several light, fast-drying coats rather than a heavy coat that takes a long time to dry and risks running.

Try different colors, I've seen many colors used as bases with very light gel stains applied over them with really amazing results.

   I have even seen one of my friends use coffee grounds to stain the walls in his living room....but that's another story...

  For me, this is the best product to use on fiberglass doors or even doors that only have primer.  It is very easy to use and apply, it can make you look like an expert in no time!

  I have found that taking regular breaks and stepping back to look at your work will help keep you on track and keep a uniform look.  Always compare your work with the first section you started!   It's easy to get lazy after half the job and lose the original feel and look.  Press through to the end, you will be amazed.

Happy Staining!

Below in the first picture is some trim I'm working on today.  A flooring company came in and left white trim against beautiful dark cabinets and I'm using gel stain to darken the trim to the cabinet color.  It will probably take 3 coats. 
  The last picture is the product I'm using today.

Monday, February 4, 2013

Foundation Issues

Cracks can be very anoying, but it's important to know what is causing the crack and the severity of the problem.
Cracks are mostly caused by small movements in the foundation generally enhanced by long wet and dry spells.  Here in North Texas, it is worsened by the blackland clay that tends to move much more than typical topsoil.
  Some cracks are caused by extreme heat causing wood to twist and buckle, more common in houses that have poor insulation.
  Take care in bringing in people to give you estimates on repairs, many companies make a living off of selling fear.
   When possible, use a company that a friend had good results with.  Get several companies to look it over and see if they all see the same problems. All estimates should be free.
  If you need actual repairs, try to use a company that has been in business a long time and guarantes their work.
Happy Spending!!

Below are 2 examples in a house we are working in today with a moderate to severe foundation problem.  The slab has moved so much that the sheetrock was actually sheered off in a couple places.  Only half of the doors even came close to closing.

  The foundation dropped in one area leaving large cracks under the baseboards.

Sunday, February 3, 2013

Saving a Tree


  I received a call a few years ago about a tree that had split in a North Texas wind storm.
  They really wanted to save the tree and so we looked a few things up online and made an attempt...


   The tree was barely hanging on and we feared it would finish splitting at any time. I bolted a chain around it for safety reasons to start work.

  As you can see in the first picture, when I started to pull the tree back together, I used heavy straps instead of a come-along because I feared the cables would damage the tree further.


After tightening and re-tightening over and over and gradually working the tree back together, the homeowner decided to go ahead and have me install a very heavy threaded bar and bolt it in place.


You can see the heavy bolt in the center of this picture.  I drilled a 3/4 inch hole all the way through the tree to install it, then put oversize washers and used the nuts to finish pulling the tree together.  This also helped keep the tree from twisting in the wind.   Eventually I installed two of them then trimmed the ends off.


This was the just before we worked on it, and now 3 years later, it is still healthy and growing and the bark is starting to grow around the bolt I installed.   We did not use any product on the split, and nothing was added to the damaged area to help the tree grow back together or to keep insects out.

It will forever have "pins" in it's joints!!

Happy Tree Fixin'!

Coons in the Attic!!

  If you ever hear noises in your attic, it's time to investigate!!
  Most popping sounds and creaks come from the house rapidly heating or cooling or from the wind blowing.  However, if you hear scratching or things running around, you could have problems.
   The first thing to do is investigate and see that it's not trees scraping a chimney or roof causing odd sounds.  Tree limbs are another problem altogether that must be addressed immediately.
 
   I received a call last Fall from a customer complaining about something living in his attic, after finding major damage, I decided to stake it out, sit quietly and see what happened.


After only 5 minutes of waiting and sweating, this little guy came out and started playing...then another.


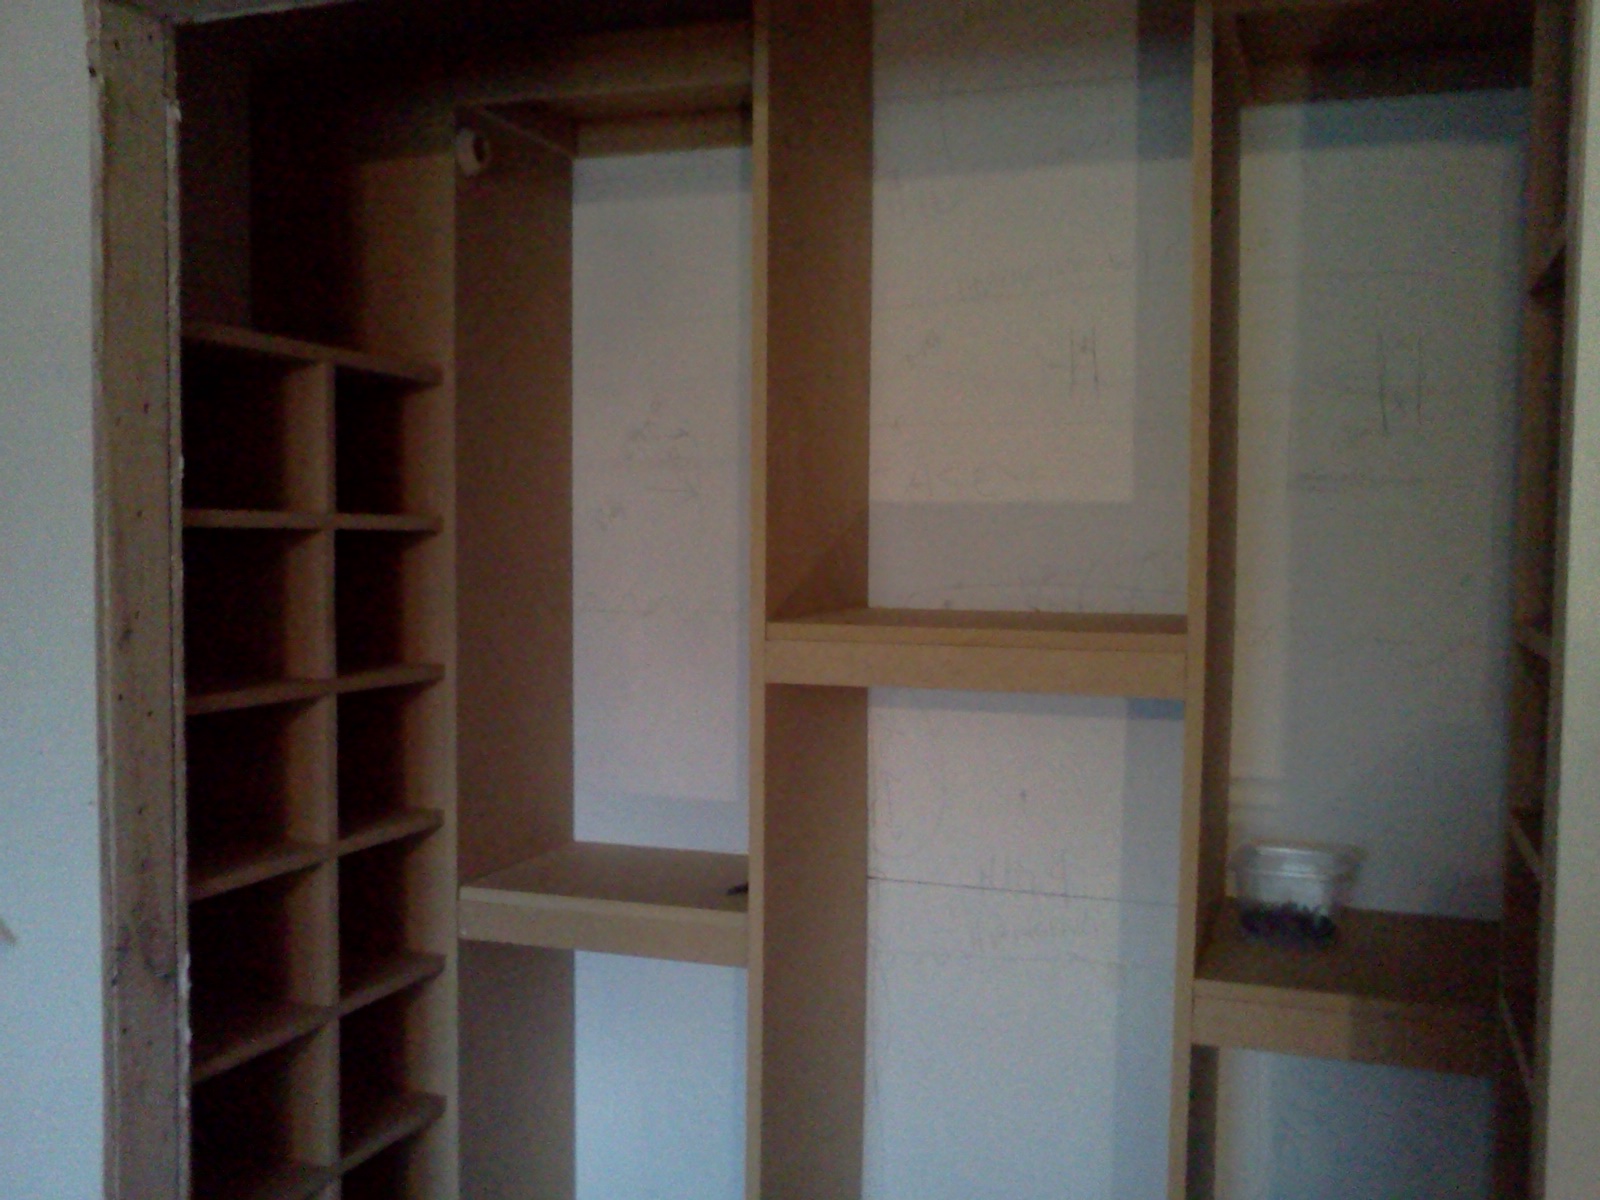
  They had done a massive amount of damage to the A/C duct work                                                                                                                    


  Here the A/C Duct was broken apart and much of the air was going into the attic!
  Most of the lines had half or more of the insulation missing.
  It stunk terribly from the droppings.
  We immediately set live traps and called a pest control company.
  I found no visible holes around the eves of the roof, but then...


  I decided to look under the house, so I took a small machete to probe into dark corners and found an old vent that had come apart that made a perfect tunnel from under the house into the attic...Later I realized there was a flea infestation due to the raccoons....but that's another story...
  It is very important to remove the animals before making repairs, first, you never want an animal to die in an inhumane way, second, if it dies, you will deal with a massive odor problem for many days!
A very cheesy picture I posted to Facebook
as I was about to investigate under the house....
  No matter how small the animal, it can cause damage and needs to be dealt with.  I've seen wires chewed, soffit and facia chewed, duct work destroyed, flea infestations, strong smells and a ton of other problems from leaving pests unchecked.

Happy Hunting!

NOTE:  Some pest control agencies in my opinion scam people out of thousands of dollars in unneeded repairs and work.  For instance, one company told us we needed to vacuum all the insulation out of an attic and blow in new due to urine in the insulation....a cost of over 4,000 dollars.  Their estimates for repairs of holes and vents was about 5 times more than what a home builder would charge.
  Double-check what they are asking you to do and if you receive an estimate for thousands of dollars, be suspicious, be very suspicious...
 

Saturday, February 2, 2013

Hanging Pictures


   Hanging pictures can be a much easier job than most people think.  There is a wide variety of products available to anchor your pictures into sheetrock, but only a couple that really work.

Please do not use nails....they are hard to remove without damaging the sheetrock if you hit a stud...

  Here is what I recommend..

Coarse threaded sheetrock screw


*  For very small and lightweight objects you want to hang, say up to a pound or so, I simply use a 1-1/4" sheetrock screw. (shown on the right)  Don't worry if it doesn't go in tight, just take care not to strip it out.  Screw it in until only 1/4 to 1/2 inch is left sticking out of the wall and hang your picture...
Anything over a pound and up to 50 or so pounds, I always...and I mean ALWAYS use this product or a similar one that looks almost identical...  It is the strongest and easiest of them all.
  Use your sheetrock screw or the screw that comes in the package to initially tap the hole where you want to put it.  One out of 20 times you will get lucky and hit a stud and you won't need it!!
  Use your phillips head screwdriver and stick it into the hole your screw made and wallow it out until the screwdriver easily slides in and out.

   Take the "wall driller anchor" (shown in the picture) and using the phillips head screwdriver, screw it into the hole just until the lip is flush.
   Lastly, you have one or two options... you can either use the screws provided or if you need a larger headed screw, use a sheetrock screw instead.  Make sure you screw it in until no more than about 3/8 of an inch is sticking out so the anchor locks in place properly.
  You can use this for pictures with "teeth" hangers or with wire hangers.

Happy Hanging!!

Here's an awkward hanging job we did yesterday...
we also hung the deer head and a dozen more pictures..